# Build Integration
# Introduction
Integrating the jSparrow Maven plugin into a build process has the advantage of automatically applying selected jSparrow rules in an already automated process. The configuration is highly customizable and depends very much on the environment. Here it will be described how Jenkins builds are able to trigger jSparrow Maven plugin builds, depending on the Git branch of the commit. In this example, all builds on a feature branch will trigger jSparrow.
# Requirements
This description assumes that the following components are available and correctly setup.
# Jenkins Configuration
A jSparrow build requires a license key and a config file (jsparrow.yml) to be present. Both can be kept securely within Jenkins and then referenced by the pipeline.
# License Key as Secret Text
The jSparrow license key can be provided using the -Dlicense=<license-key> parameter, as described in the Plugin Goals. However, it might not be desirable to provide the key in plain text.
With the help of Jenkins "secret text" credentials, it is possible to never have the license key appear in the pipeline. Even in log statements the "secret text" will only appear as asterisks.
Jenkins lets users add credentials either globally, or build pipeline specific. For one pipeline, there is no practical difference between one or the other.
- Navigate to the "Add Credentials" either global or pipeline specific
- Global: Manage Jenkins -> Manage Credentials -> System (click on "Store") -> Global credentials (unrestricted)
- Pipeline specific: [Your Pipeline] -> Credentials -> Stores scoped to [Your Pipeline] -> Global credentials (unrestricted)
- This is a description of the fields of the following screen:
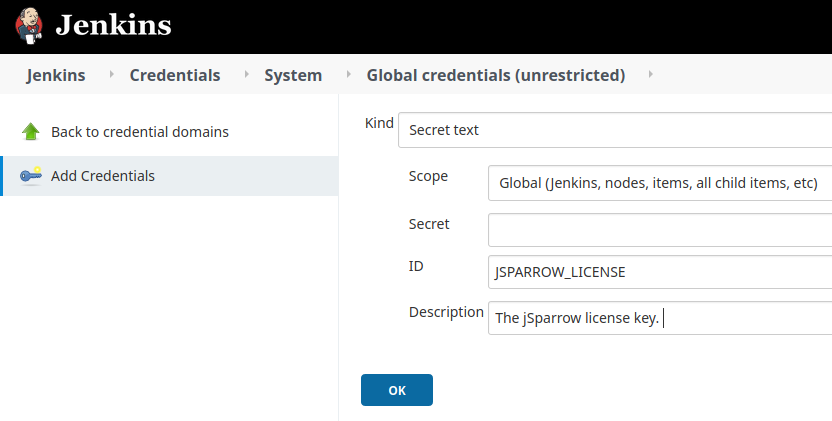
- Kind: Select "Secret text"
- Scope: This needs to be "Global", otherwise the pipeline will not have access
- Secret: This is where the jSparrow license key has to be provided.
Note: The content of this variable cannot be viewed anymore after putting it here and it will not appear in logs or echo statements. - ID: This is the key with which the secret text can be referenced in the pipeline
- Description: It is always a good practice to provide a description
# jSparrow Config File
Customization about which rules to apply or which resources to skip are done in a config file (jsparrow.yml), as described in detail in Plugin Configuration.
By default, this configuration file is expected to reside in the project's root directory. Alternatively, there is the option to fully manage the jSparrow configuration in Jenkins. This might have the following advantages:
- The
jsparrow.ymldoes not need to be committed to the project's SCM repository - Jenkins administrators can manage the configuration globally
The config file can be added as follows:
- Navigate to Manage Jenkins -> Managed files and click "Add a new Config"
- Add a new "Custom file" and provide a meaningful ID
- This is a description of the fields of the following screen:
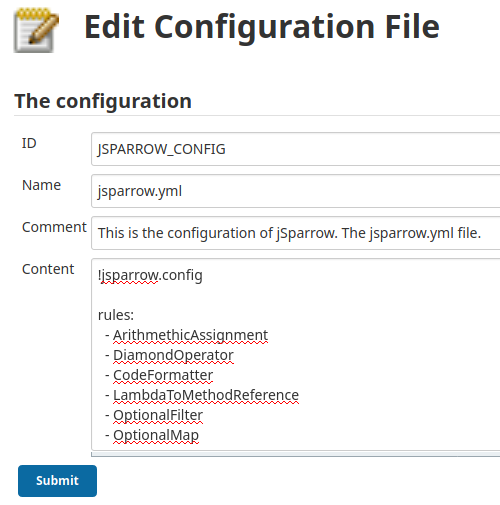
- ID: The key with which the file will be referenced within the pipeline
- Name: The file name
- Comment: An optional description
- Content: The configuration according to the Plugin Configuration
# Pipeline Configuration
With Multibranch Pipelines (opens new window), Jenkins offers a way to run builds on all branches of a repository. This is very useful when following a branching model, such as Gitflow (opens new window), where different types of branches have different purposes. The current branch can be determined during runtime (env.BRANCH_NAME or via Built-in Condition (opens new window)), making it possible to process certain branches differently.
In this example, a declarative Multibranch Pipeline will be configured to run the jSparrow Maven plugin on feature branches. In Gitflow, a feature branch should only be merged into develop (and master) after being reviewed in a pull request.
Here, the necessary pipeline file will be described one part at a time. Click on Jenkinsfile.groovy (opens new window) for the full file.
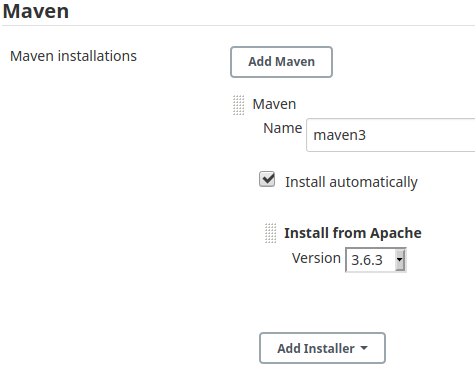
# Tools Configuration
Both the Maven and JDK version have to be specified for the build.
tools {
  jdk 'JDK8'
  maven 'maven3'
}
The referenced names (JDK8 and maven3) have to point to a corresponding configuration in Manage Jenkins -> Global Tool Configuration, as seen in the example below.
# Checkout and Setting a Flag
The purpose of this step is to checkout the current commit, to check if the last commit was done by jSparrow and to set a flag if that has been the case.
A declarative pipeline automatically creates a checkout stage by default. To avoid that, we use the option skipDefaultCheckout true and create our own checkout stage.
options {
  skipDefaultCheckout true
}

environment {
  JSPARROW_FLAG = true
}

stages {
  stage('Checkout') {
    steps {
      checkout scm
      script {
        result = sh (script: "git log -1 --pretty=%B | grep '\\[jSparrow\\]'", returnStatus: true)
        if (result == 0) {
          JSPARROW_FLAG = false
        }
        echo "jSparrow flag: " + JSPARROW_FLAG
      }
    }
  }
  ...
}
In order to avoid endless build loops, a flag (JSPARROW_FLAG) is set to false whenever the current commit has been done by jSparrow. In this example, the flag is set whenever the commit message contains [jSparrow].
# jSparrow Execution
This step can be split into three main parts:
- Deciding on whether or not to trigger jSparrow
- Executing jSparrow
- Pushing the changes to Git
# Whether or Not to Trigger jSparrow
By default, all conditions within a when directive (opens new window) must be true in order for the stage to be executed.
when {
  // only execute on feature branches..
  branch pattern: "feature/.*", comparator: "REGEXP"
  // ..and if the JSPARROW_FLAG is still true
  expression {
    JSPARROW_FLAG.toBoolean() == true
  }
}
The purpose of this when condition is to make sure that the current branch is a feature branch and that the flag is still true.
# Executing jSparrow
In this step we make use of the previously defined JSPARROW_LICENSE (see License Key as Secret Text) and JSPARROW_CONFIG (see jSparrow Config File).
environment {
  JSPARROW_LICENSE = credentials('JSPARROW_LICENSE')
}

steps {
  // make the jsparrow.yml available with via configFileProvider
  configFileProvider([configFile(fileId: 'JSPARROW_CONFIG', targetLocation: '/tmp/jsparrow.yml')]) {

    sh "mvn jsparrow:refactor -Dlicense=$JSPARROW_LICENSE -DconfigFile=/tmp/jsparrow.yml"

  }
  ...
}
A declarative pipeline offers an environment directive (opens new window) to access credentials (e.g., a secret text) and set the content to an environment variable (JSPARROW_LICENSE). This environment variable is then accessed within a shell command (sh) by using a dollar sign: $JSPARROW_LICENSE.
The configFileProvider plugin (opens new window) is used to make the JSPARROW_CONFIG file available to the build in a local path. Here, the config file is placed into /tmp/jsparrow.yml. This path is then passed to the jSparrow execution.
All that remains is to call the jsparrow:refactor goal with the two resouces.
# Pushing the Changes to Git
After running jSparrow, the changes have to be committed and pushed to the original repository, in order for the changes to be persisted.
As long as the GitPublisher plugin does not support pushing (see JENKINS-28335 (opens new window)), a workaround is required for pushing changes. The SSH Agent plugin (opens new window) can make use of already defined SSH credentials and will therefore be used in this example.
sshagent(['SSH_KEY_ID']) {
  sh "git config user.name 'jSparrow'"
  sh "git config user.email 'info@jsparrow.io'"
  sh "git add --all"
  sh "git commit -m '[jSparrow] automatic refactoring'"
  sh "git push origin HEAD:$env.BRANCH_NAME"
}
- The
sshagentreferences an SSH key by ID. See the following screenshots as reference: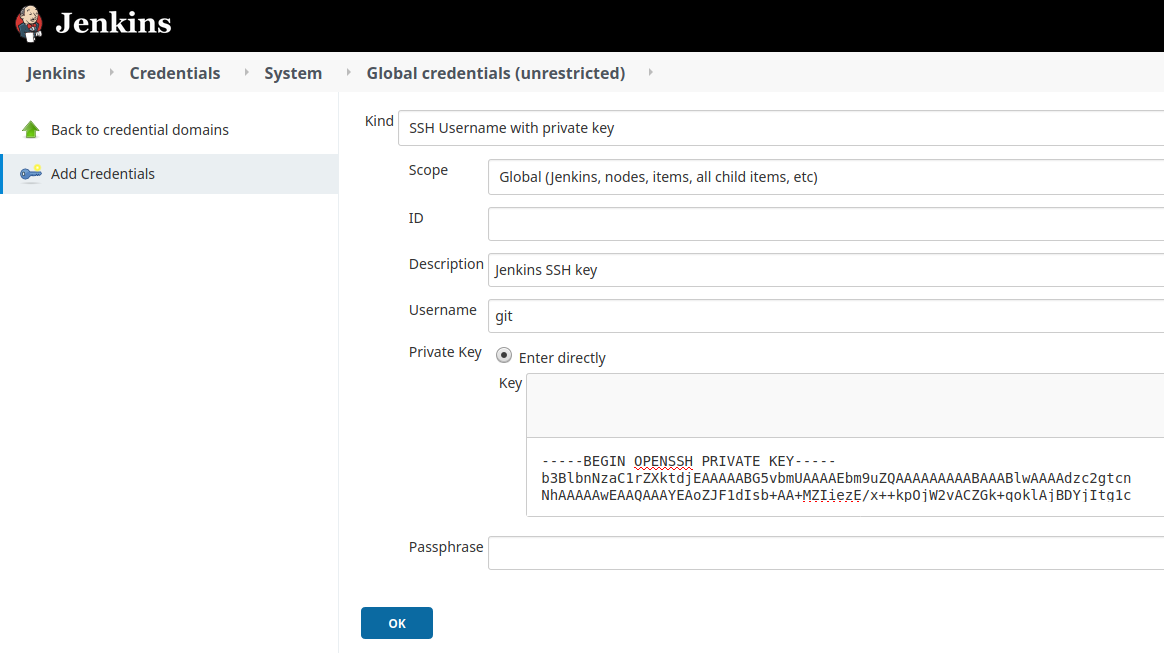
- Note: The commit message contains
[jSparrow]. This is used as an indicator to set theJSPARROW_FLAG(see Checkout and Setting a Flag ). - Jenkins always checks out single commits as detached HEAD. For this reason, we need to specify the branch to push to. Jenkins provides an environment variable
env.BRANCH_NAME, which makes it easy to determine the refspec destination.
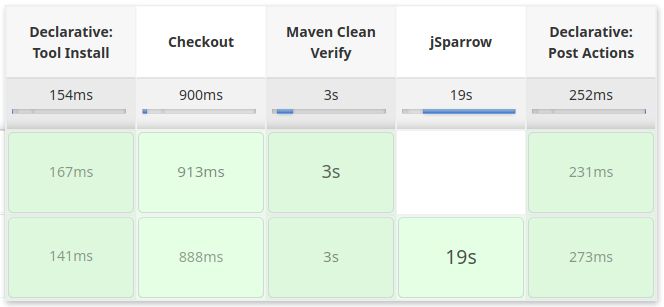
# End Result
In the end, the pipeline should be triggered whenever both of the following conditions are met:
- The commit in question is done on a feature branch.
- The commit in question is not done by a jSparrow refactoring (i.e., the commit message does not contain
[jSparrow]).
The screenshot below shows an example of a feature branch commit triggering jSparrow, followed by a [jSparrow] commit, which skips the jSparrow step.